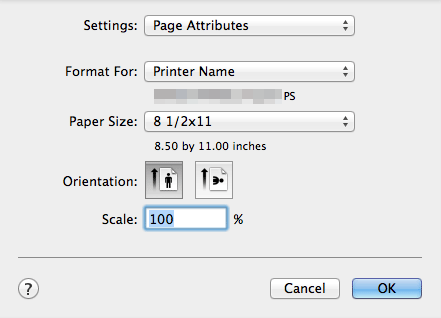
[Page Setup] Window of the Printer Driver
How to display the [Page Setup] window
Open document data using the application software. From the [File] menu, select [Page Setup].
Check that the desired printer is selected in [Format for:].
The [Page Attributes] window appears.

Available Operations in [Page Attributes]
In [Page Attributes], you can configure basic settings about paper.
Setting | Description |
|---|---|
[Paper Size:] | Select the size of paper for printing. To print on custom sized paper, use [Manage Custom Sizes...]. For details, refer to Here. |
[Orientation:] | Specify the orientation of the original created in application software. If the setting in the printer driver differs from the one specified in the application software, correct the setting. |
[Scale:] | Specify the zoom ratio to enlarge or reduce the original image. The setting range differs depending on the Mac OS version. |
[12 18] in [Paper Size:] is equivalent to 304.8 457.2 mm that is slightly larger than A3.
When you want to print on the entire paper of the standard size, select "W" for each standard size in [Paper Size:]. The original is printed at the center of paper larger than the original.
For example, if you want to center and print 8-1/2 11 (A4) size data on 11 17 (A3) sized paper, create data with the "8-1/2 11W" ("A4W") size, and then, using the printer driver, set [Paper Size:] to [8-1/2 11W] ([A4W]) and specify the paper tray to be used as [Paper Tray].
On this machine, load 11 17 (A3-size) paper into the required tray, and check the paper size as follows.
Select the tray in [Paper] for the copy mode. Then, check that [Auto Detect] is selected in [Paper Size] and 11 17(A3) is displayed when [8-1/2 11W] ([A4W]) is specified in [Wide Paper] on the tray setting change screen.
If 12 18 paper is loaded, select [12 18] in [Paper Size].
To print data on custom-size paper, use one of Tray 1, Tray 2, and Bypass Tray. Then, select [8-1/2 11W] ([A4W]) in [Wide Paper] on the tray setting change screen, and enter the desired paper size in [Change Size].[Paper Size] and [Orientation] can also be specified in the Print window.
